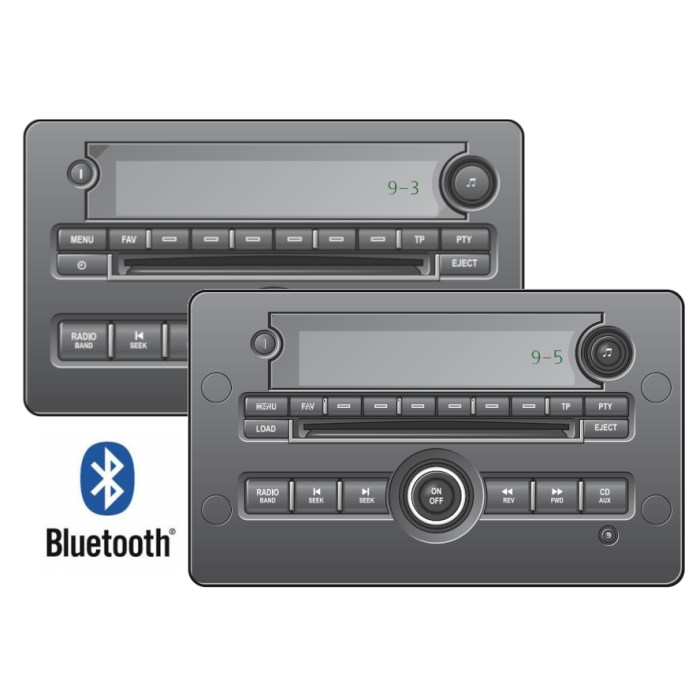
xConnect is a retrofit bluetooth kit for Saab 9-5 and Saab 9-3. Easy to use and works as a bluetooth accessory to your phone.
This product is compatible with:
- SAAB 9-3, generation 1 (2007-12), without navigation. Should look like one of the pictures in the gallery.
- SAAB 9-5, generation 1 (2006-10), without navigation. Should look like one of the pictures in the gallery.
Highlights
- Plug and play installation. No soldering, no cutting of cables!
- No workshop activation required. Just install and press the RADIO-button once or twice to activate!
- Designed to ensure the best possible sound quality.
- Wired quality sound, wirelessly.
- CE-certified & RoHS2-compliant
- Steering wheel button to change track on 9-5: Nxt button. Might not work for all 9-3.
Installation
The installation is straightforward and easy. The first step is to remove the stereo, which varies slightly between 9-3 and 9-5. For 9-5, remove the four plastic buttons and unscrew the torx heads and pull the stereo outwards. For 9-3, remove the vent above the stereo and unscrew the torxs, lift the stereo slightly upwards and pull it out. Once the stereo is removed, xConnect is installed by:
- Remove the two black plastic connectors from the back of the stereo.
- Place the two black connectors from xConnect where you just removed the connectors. Connectors will only fit at the right place.
- Install the two connectors initially removed from the stereo in the connectors of xConnect. Connectors will only fit at the right place.
- Put the xConnect behind the stereo and push the stereo back to where it was.
- Test xConnect by pairing to SAAB BLUE. Press the radio button once or twice to get into xm-band. Play a song on your phone and it should work as expected.
- Reassembly everything.
The video in the gallery shows installation on a SAAB 9-5.
xConnect SAAB is CE certified and meets high product safety standards
CdConnect is CE-certified. This means that the product meets the requirements of relevant directives and has undergone the prescribed procedure for verifying compliance with the requirements (i.e. test performed by external institutes).
- Electromagnetic compatibility according to EN61000-1, EN61000-2, EN61000-6-3, EN61000-6-4. This means, in short, that the product works in the car without behaving strangely or affecting other equipment with respect to the electromagnetic energy that the product is exposed to or creates.
- Electromagnetic compatibility according to EN 50498: of 2010. Meets the requirements of this standard for electronic equipment for installation in vehicles.
- Restriction of the use of certain hazardous substances in electrical and electronic equipment under the RoHS 2 (Directive 2011/65 / EU). This is a legal requirement and involves limiting or completely eliminating the use of six chemicals. One of these chemicals is lead which historically have been used in soldering, and still is in DIY-solution or prototype manufacturers - but not in CdConnect!
Tools needed for installation
No tools are included. Tools needed: a torx 25 driver, a plastic card or similar (to avoid scratches on the panel) and something (like a sharp knife, screw driver, plastic prying tool) to pry the vent out (for 9-3) and the plastic buttons (for 9-5).
| Model | 9-3 (Gen 1), 9-3 (Gen 2), 9-5 (Gen 1), 9-5 (Gen 2) |
|---|

